

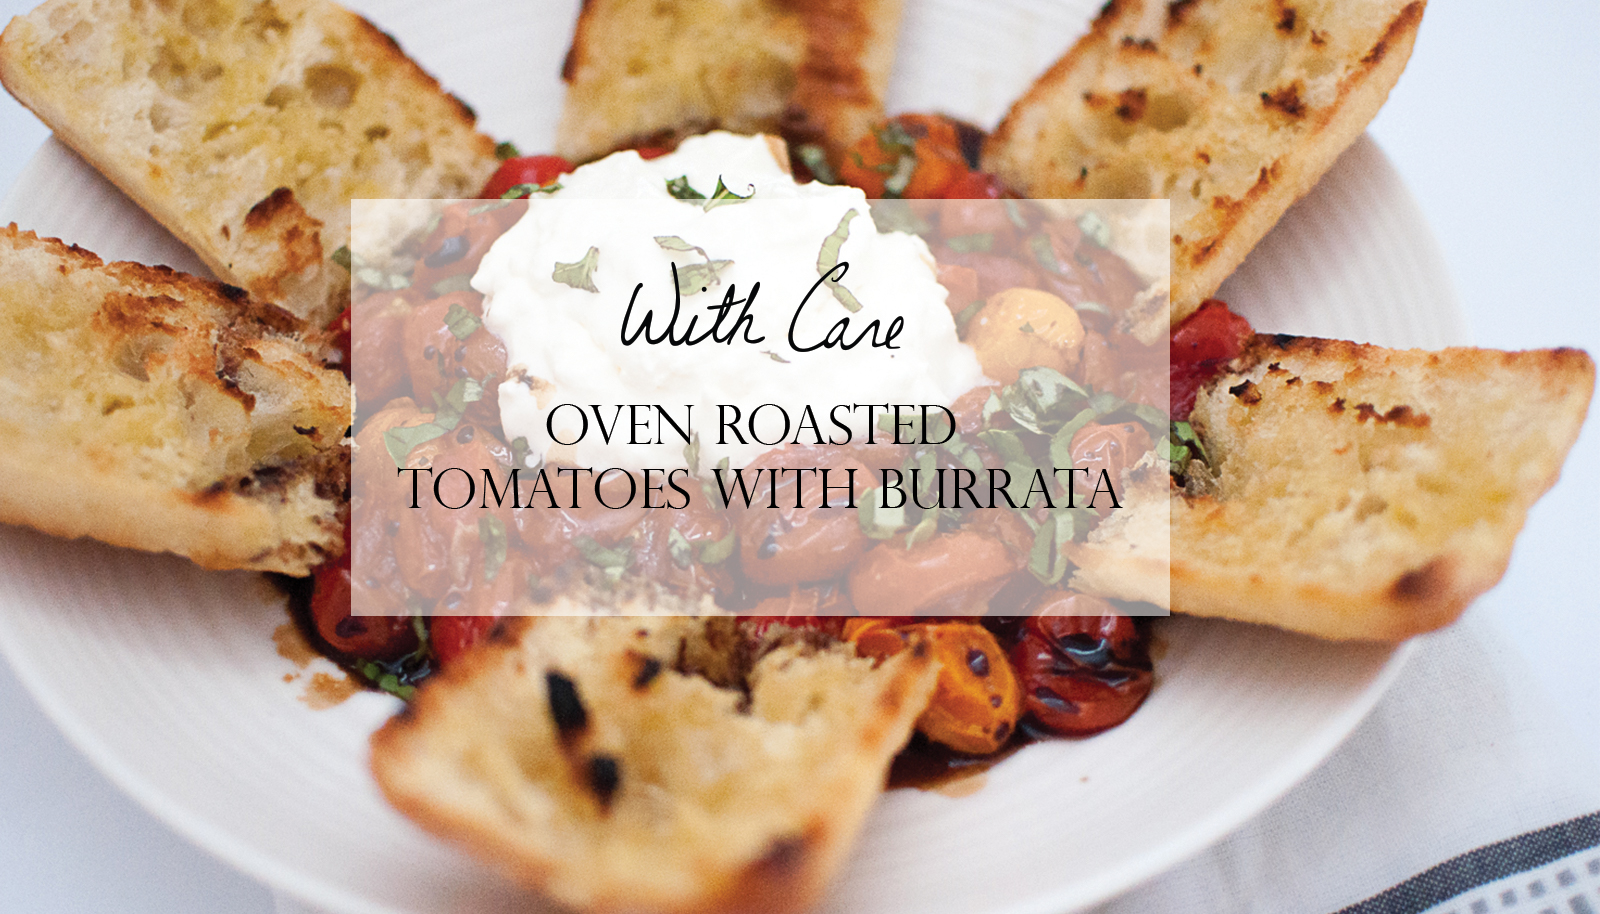
Oven Roasted Tomatoes with Burrata - Simple Summer Recipe
Summer is here and local tomatoes are hitting the farmers markets, so I wanted to share one of my favourite seasonal recipes. I was forced to recreate this recipe at home, because the local restaurant I usually get it at sadly closed this spring. I'm so happy with how it turned out. I always think it's a good sign when you need to make a new recipe twice in one weekend. That's exactly what I did with this one.
Summer is here and local tomatoes are hitting the farmers markets, so I wanted to share one of my favourite seasonal recipes. I was forced to recreate this recipe at home, because the local restaurant I usually get it at sadly closed this spring. I'm so happy with how it turned out. I always think it's a good sign when you need to make a new recipe twice in one weekend. That's exactly what I did with this one.
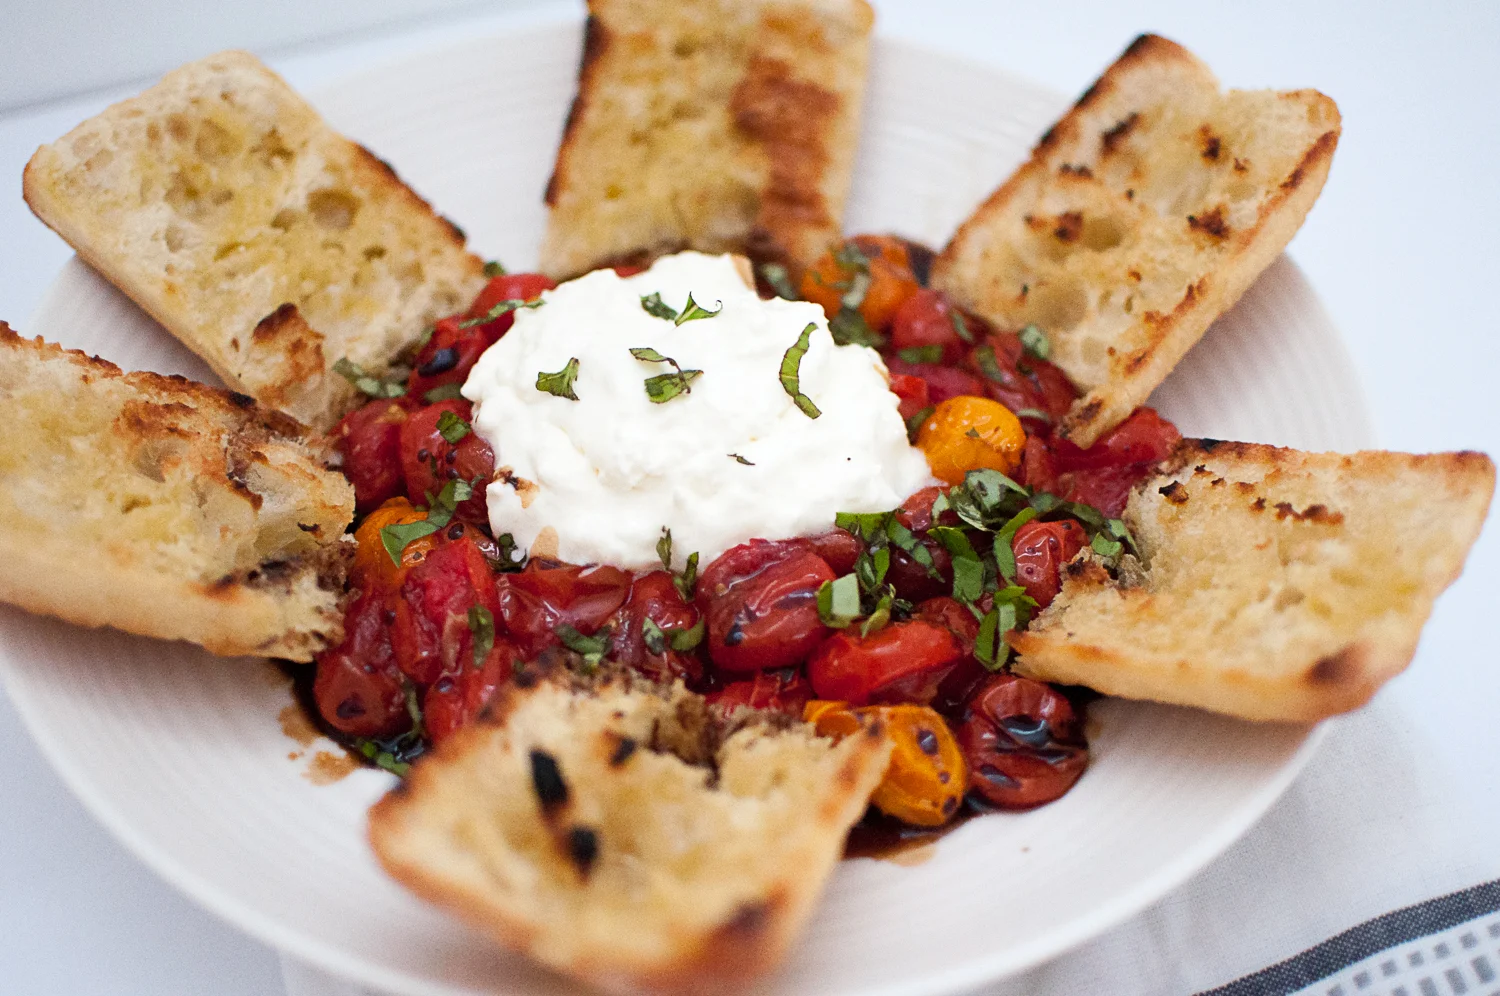
If you're anything like me you won't be able to get enough of these soft, warm roasted tomatoes drizzled with olive oil, balsamic, sea salt, fresh chopped basil and a generous helping of burrata. Add in some grilled bread and you really can't go wrong.
This recipe includes only 7 ingredients, 6 of which we typically have on hand ...not the buratta ;) It takes about 20 mins to make from start to finish, and tastes like pure summer, so that makes it pretty perfect in my books.
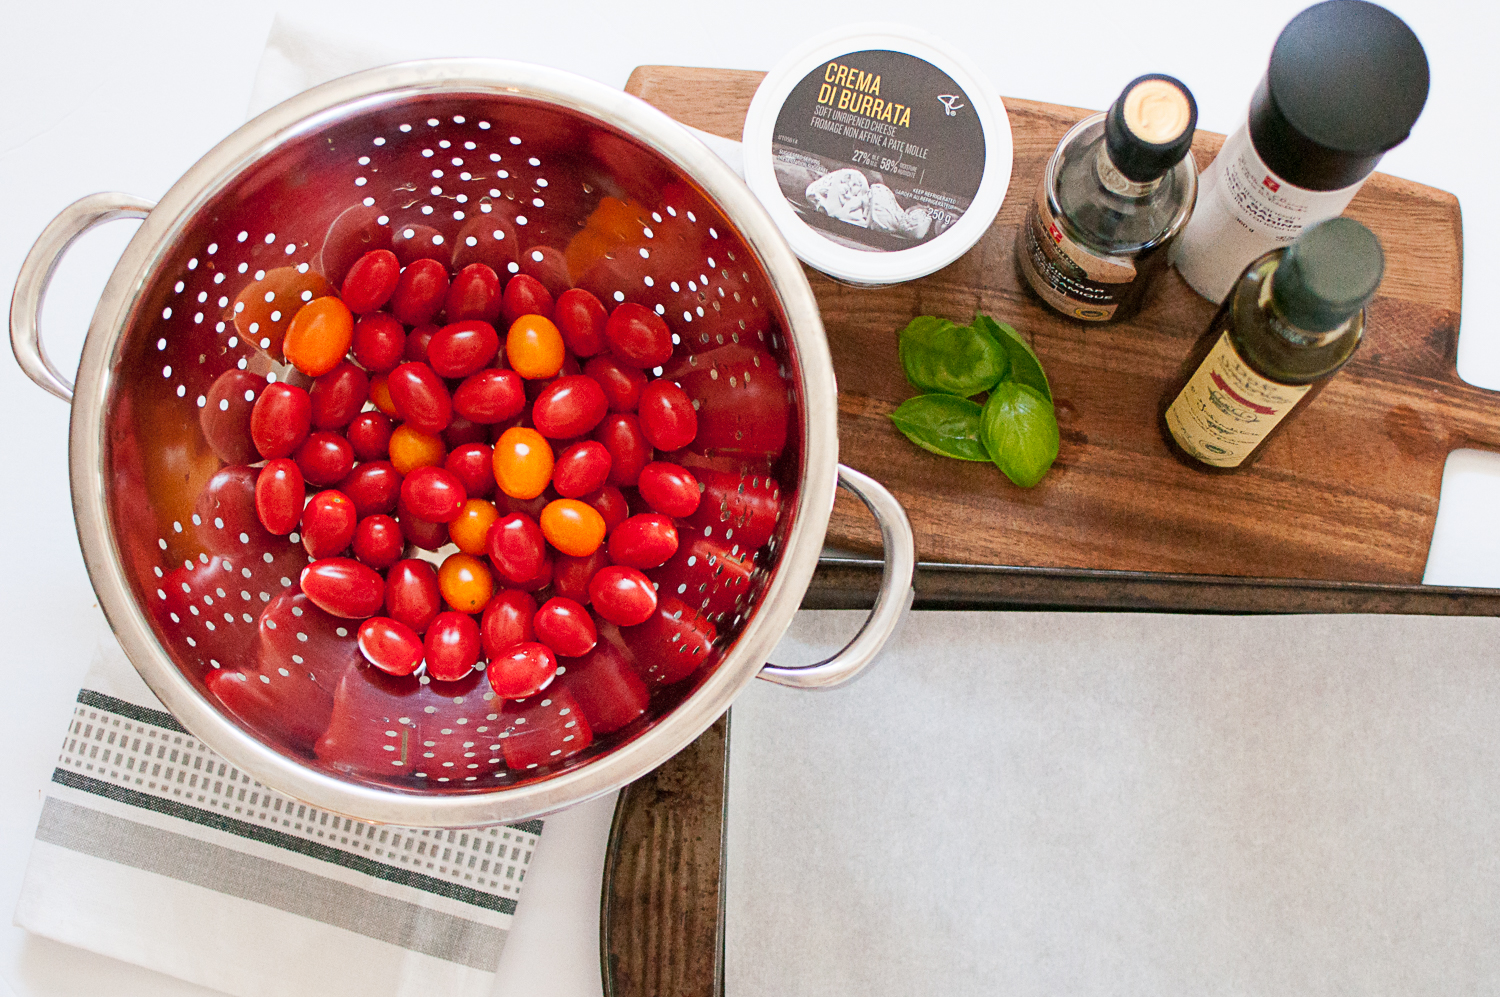
INGREDIENTS: 1 quart of grape or cherry tomatoes, a few basil leaves, olive oil, sea salt, balsamic vinegar, 1 pkg of burrata cheese, baguette.
DIRECTIONS:
1. Wash tomatoes & basil
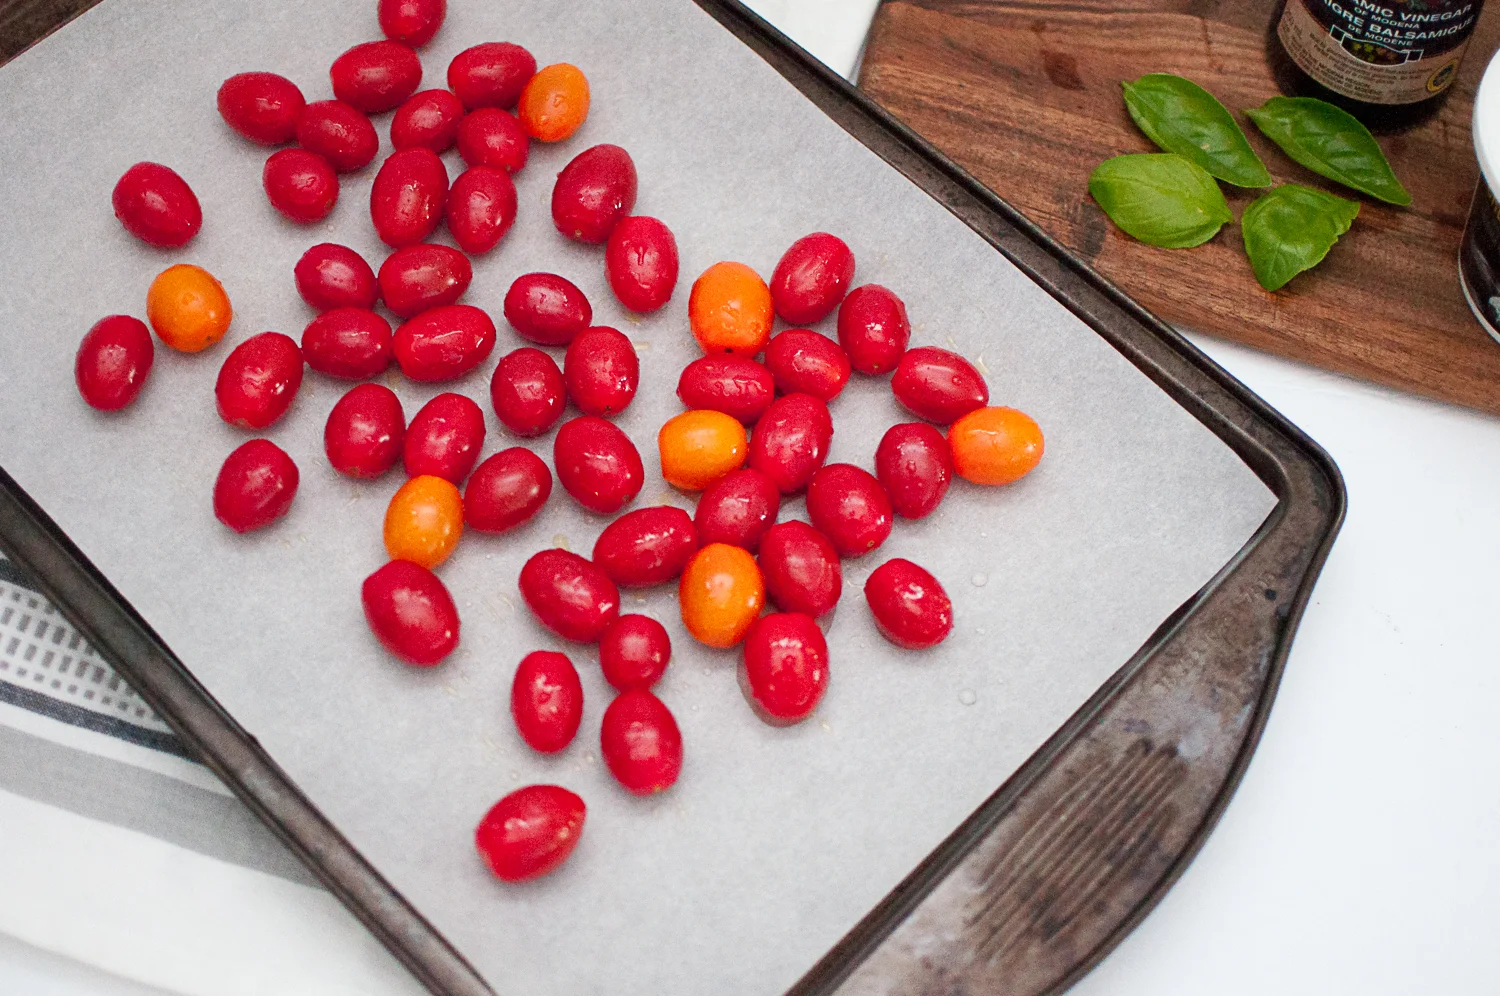
2. Toss tomatoes with olive oil and sea salt and place on parchment lined baking sheet. Bake at 400 for 15-20 minutes
3. Brush baguette with olive oil and grill in a grill pan over medium high heat while tomatoes roast.
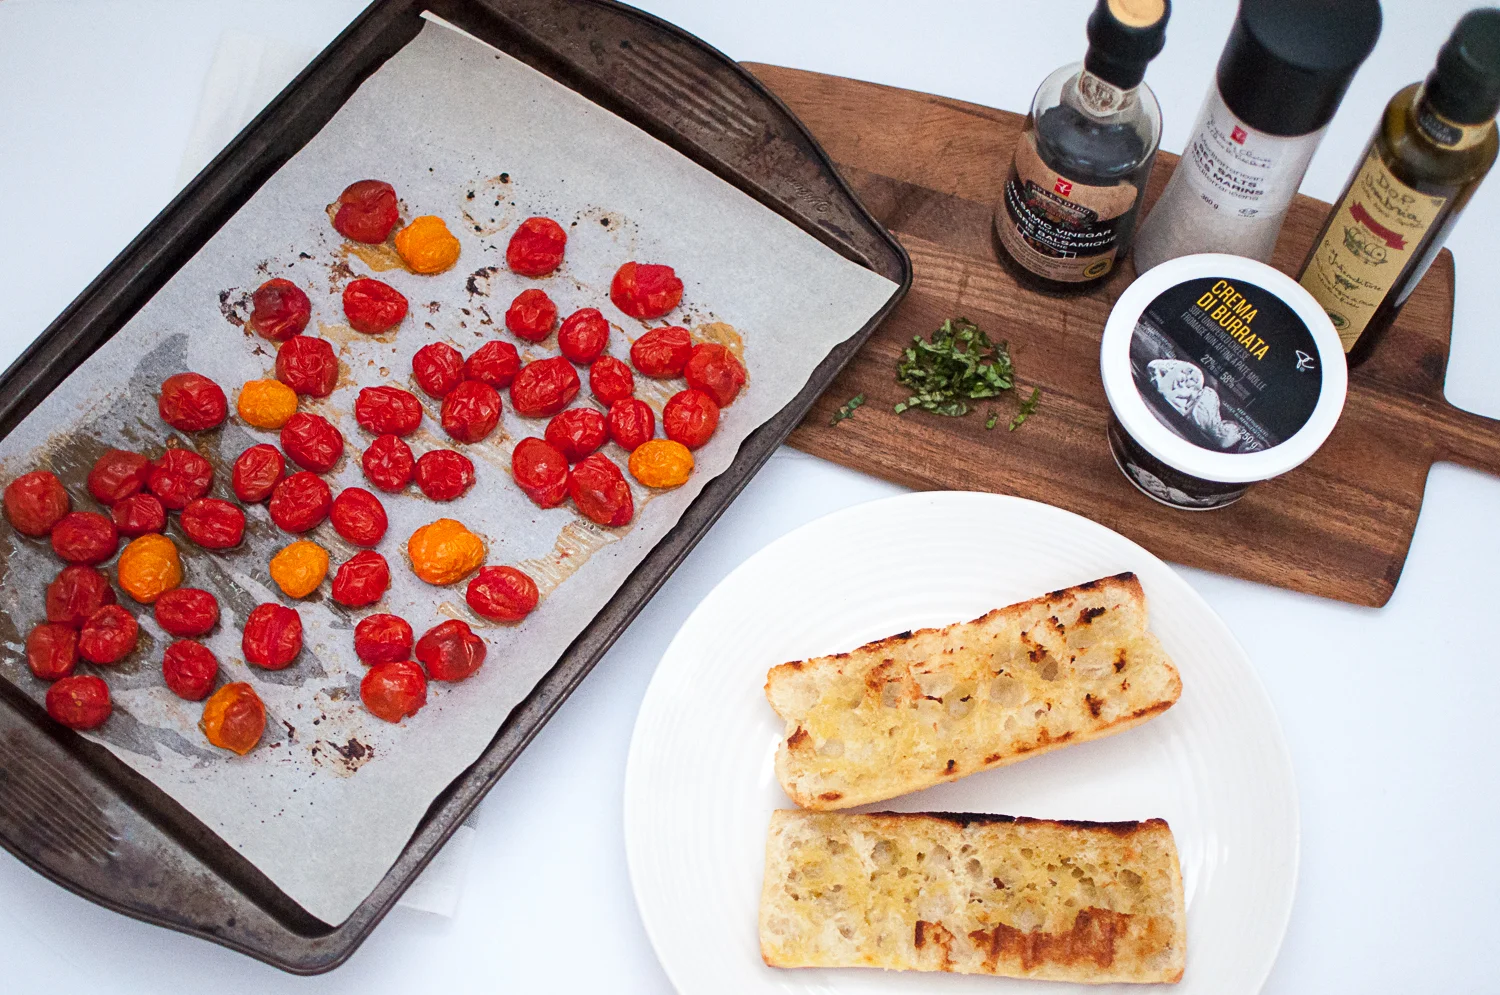
4. Once tomatoes are done, remove from oven, let cool for a few minutes, and then transfer to plate.
5. Add generous helping of buratta, and drizzle with balsamic, olive oil, sea salt and fresh chopped basil. Serve with grilled bread.
This recipe is going to be in heavy rotation around here this summer. I can't wait until we can make it with our own homegrown tomatoes.
Care
Simple No Knead Artisan Bread
I often yearn for fresh baked bread as the fall weather settles in and we start making more soups, stews and warm hearty meals. My mom introduced me to Artisan bread baking years ago when I was in university, but at the time I didn't truly appreciate how amazing and easy the method was.

I often yearn for fresh baked bread as the fall weather settles in and we start making more soups, stews and warm hearty meals. My mom introduced me to Artisan bread baking years ago when I was in university, but at the time I didn't truly appreciate how amazing and easy the method was. Last week a fellow babywearing Instagram mom of 3 @ellerowley (owner of Sollybaby Wraps) shared her favourite simple artisan bread recipe and it peaked my interest. I had to try it. **Please note: the original recipe used is no longer available. Here is a similar 4 ingredient no-knead artisan bread recipe version.
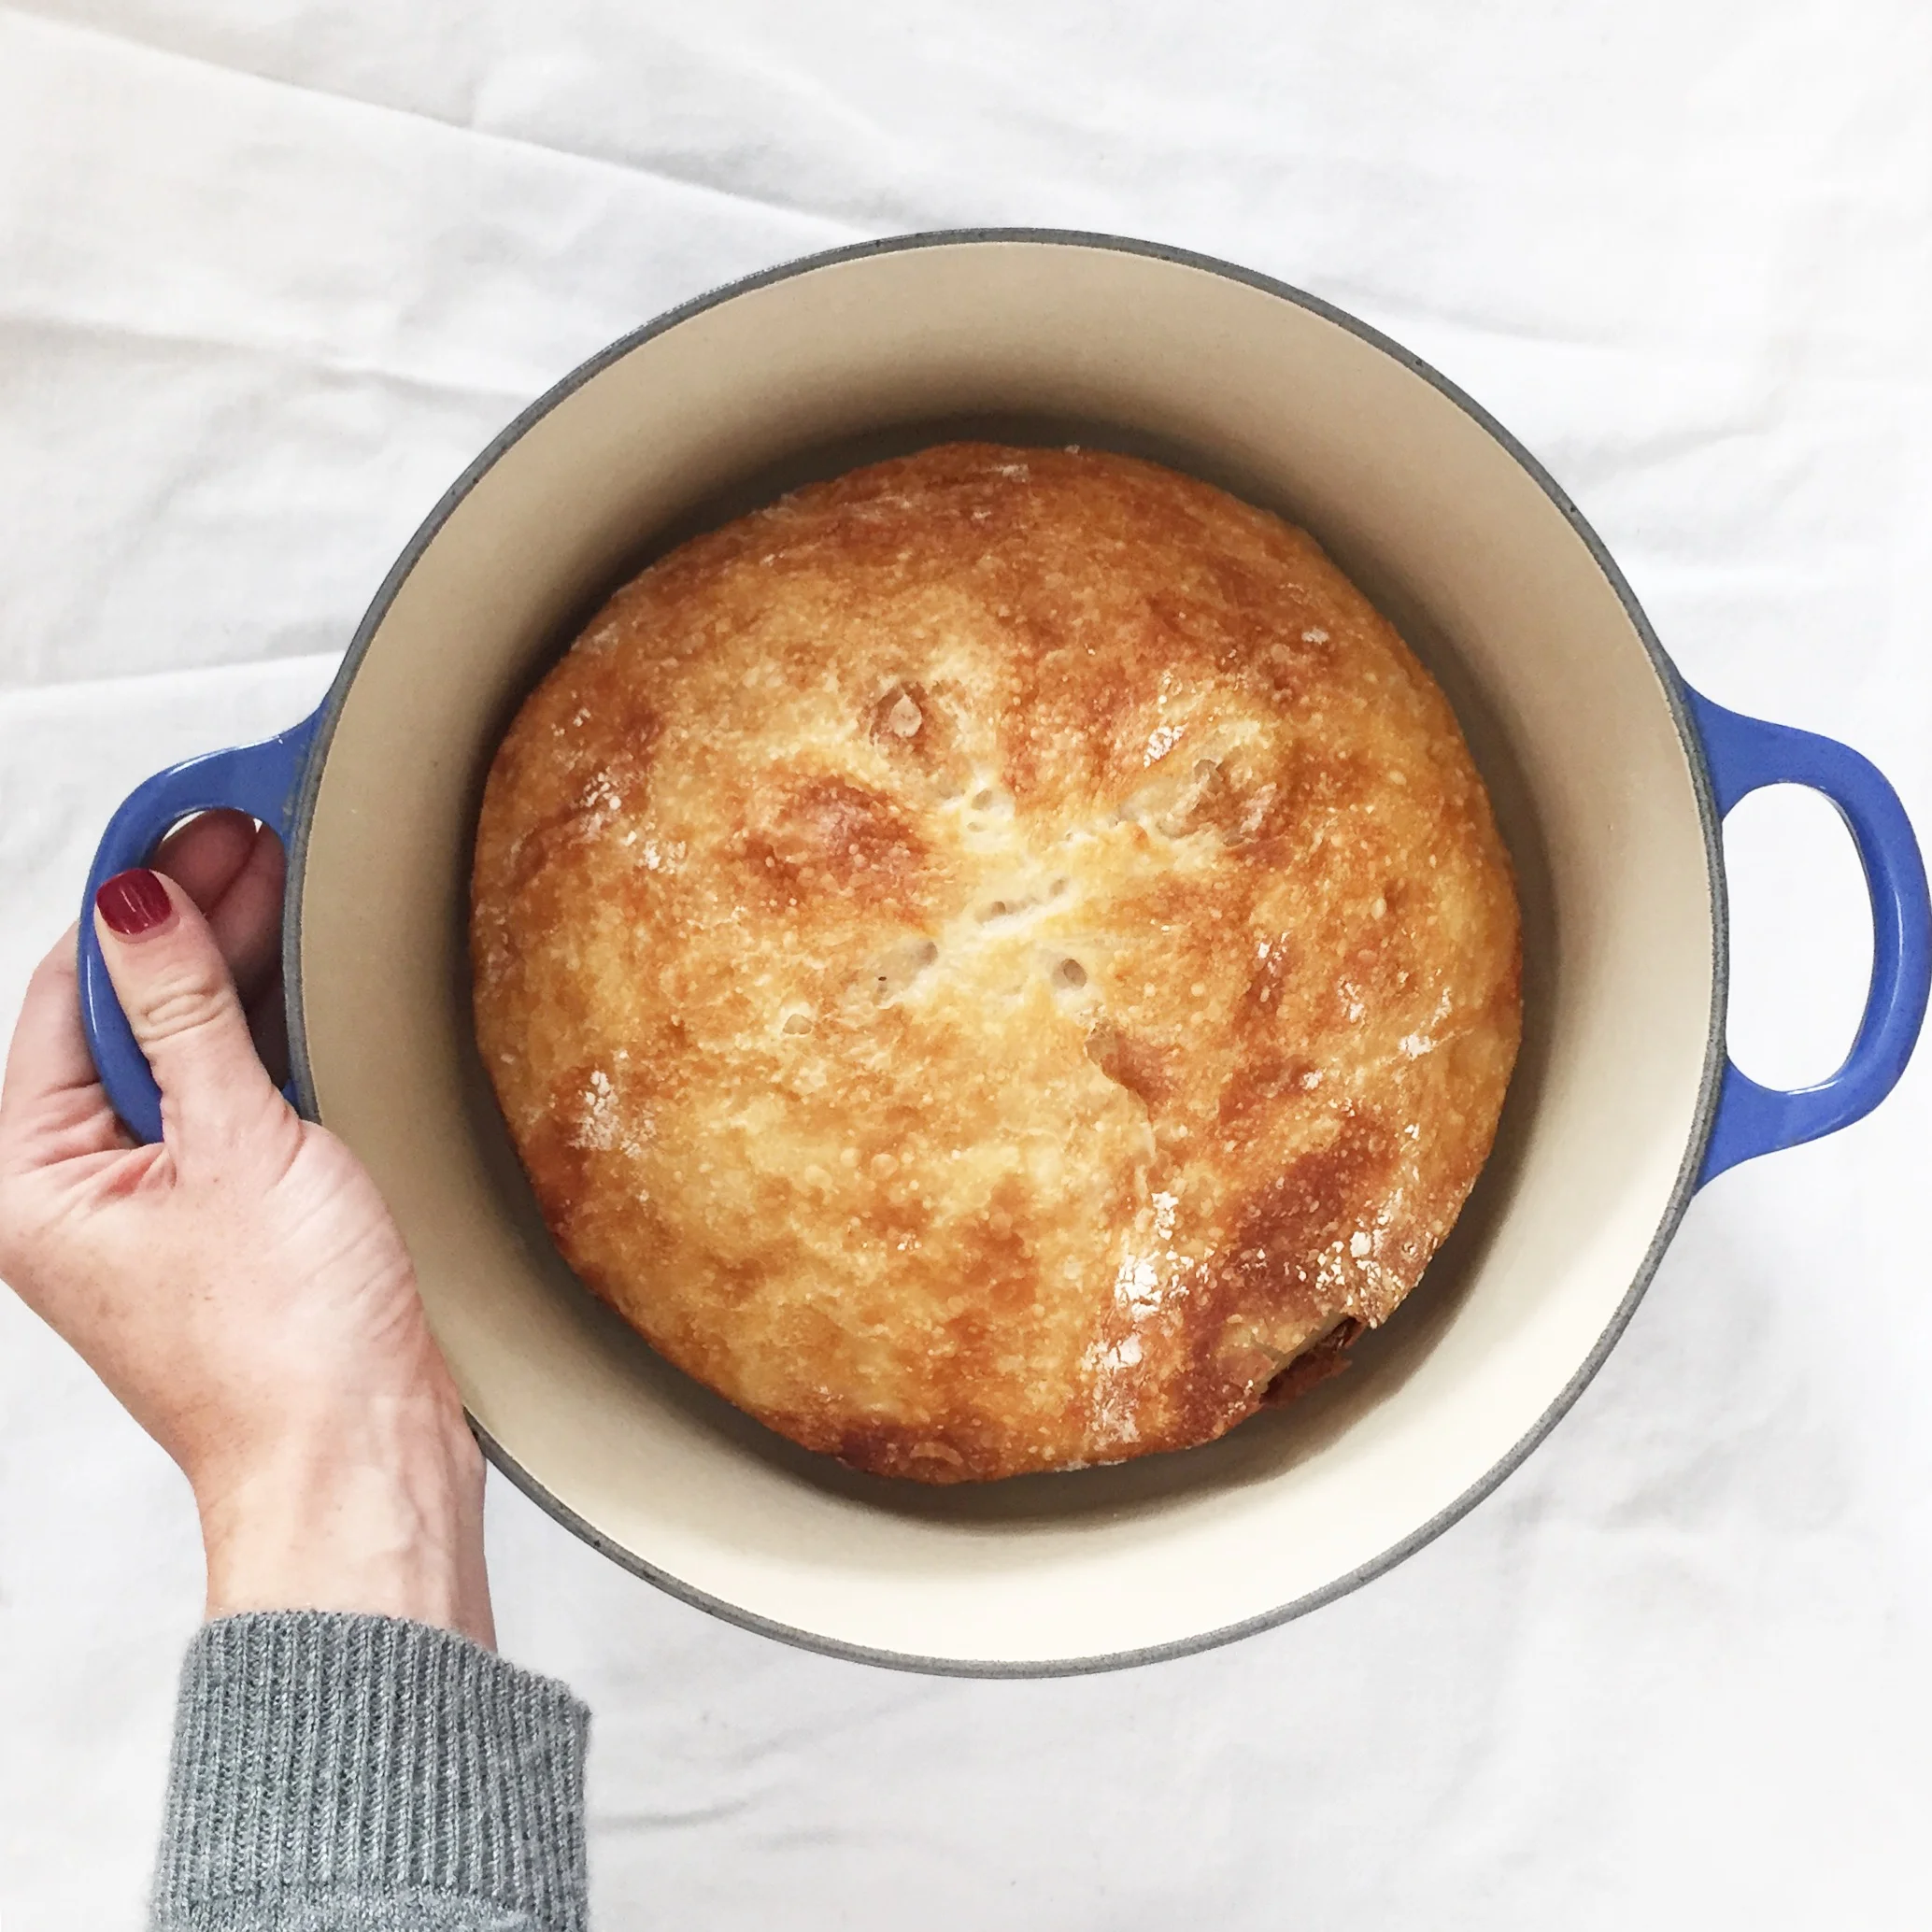
Last night I made a batch of dough (a 5 minute process that involves mixing 4 ingredients with a spoon, no kneading!), I let it rise overnight, and today I baked it. All I can say is, you won't be disappointed if you make this bread. It is absolutely delicious. It has a perfect crusty shell with a soft light centre that melts in your mouth. Plus your house will smell like a french bakery. Mmm...
I baked the bread it in our Le Creuset Enamel Cast Iron French Oven. I was concerned about the handle of the lid and couldn't find solid advice on whether it could withstand the 475 degree temp, so I decided to play it safe and used tin foil to cover the pot instead. It worked brilliantly. Hope your family enjoys this bread as much as ours did.
Happy Baking!
- Care
*In case you need something to go with your bread...Here's a delicious Roasted Squash Soup recipe from a few years ago that is still a favourite in our house. Enjoy!

3 Must Haves for Veggie Garden Success!
Spring is here and it's officially gardening season. Yay! My hubby and I are avid gardeners and have been busy at work over the last few weeks preparing and planting our annual fruit, veggie and herb garden. As I've been posting pics to Instagram I've been getting lots of requests for details about our garden accessories, so I thought I would share my must haves with everyone...
Spring is here and it's officially gardening season. Yay! My hubby and I are avid gardeners and have been busy at work over the last few weeks preparing and planting our annual fruit, veggie and herb garden. As I've been posting pics to Instagram I've been getting lots of requests for details about our garden accessories, so I thought I would share my must haves with everyone. These 3 items are a big investment up front, however all of them will serve your garden well for many years to come, and impact the survival, growth and yield of your garden each year.
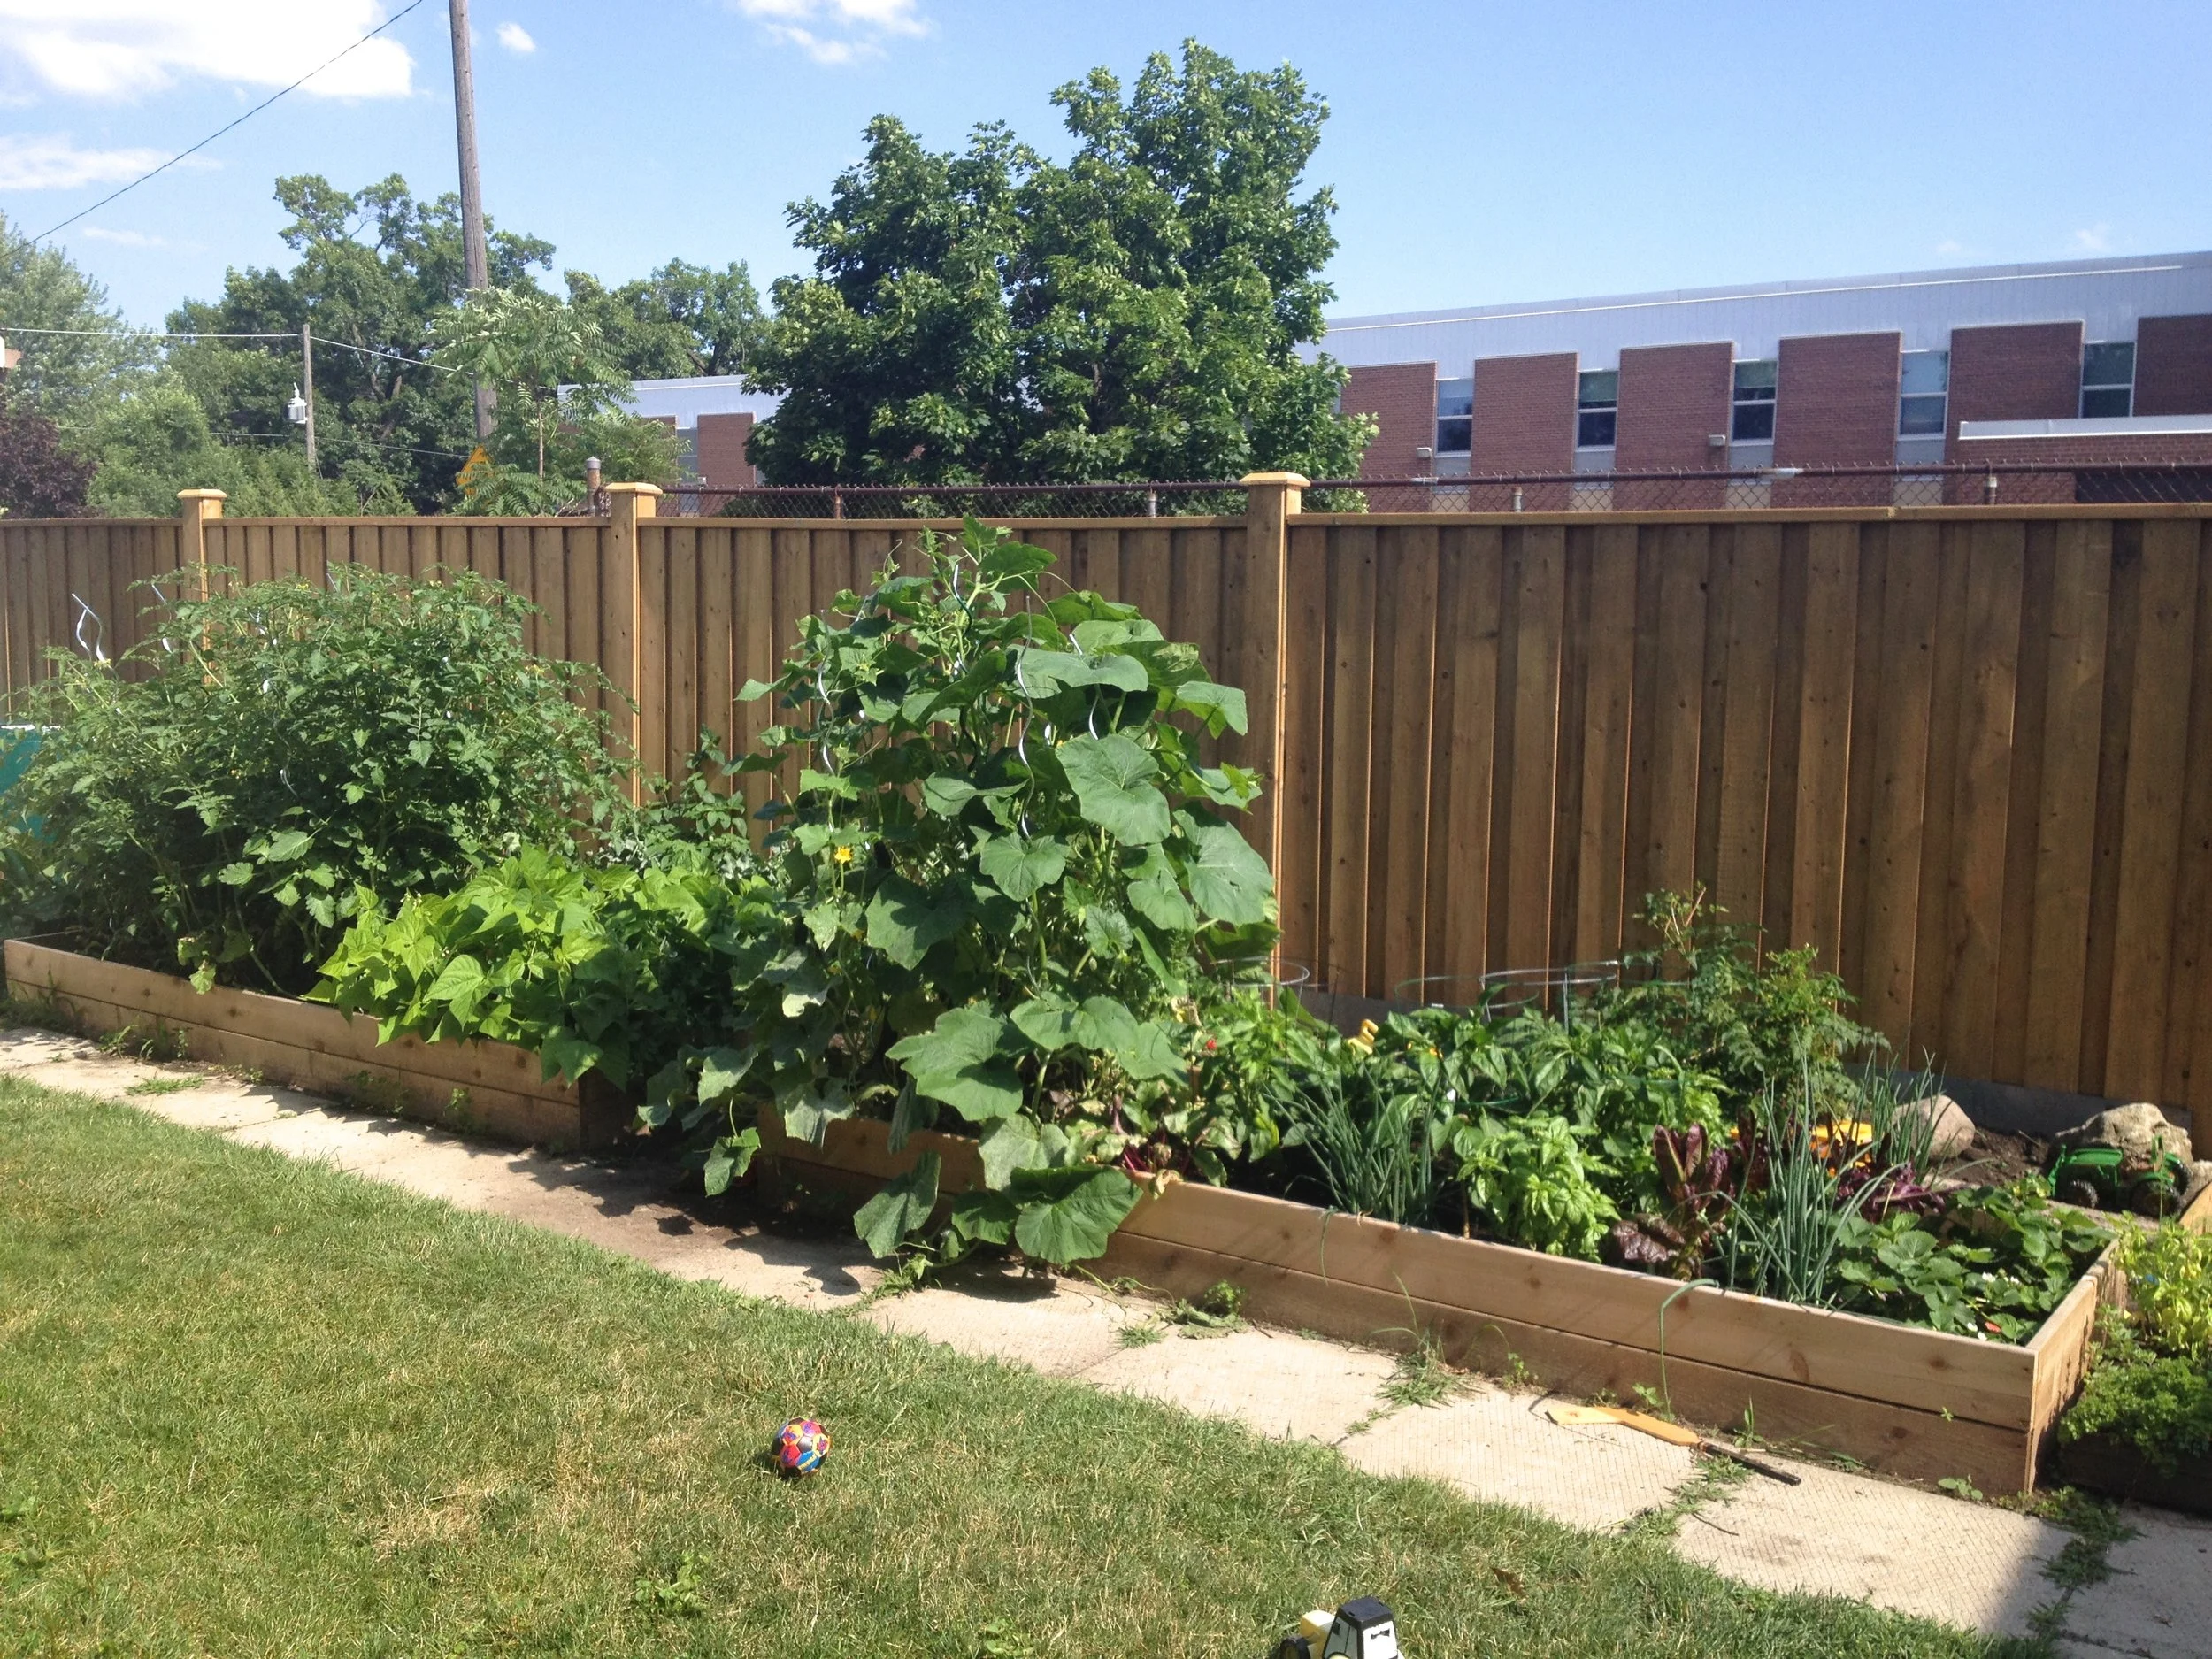
Here's a glimpse of our garden in July 2014. Needless to say we hope to have another year just like it.
Care's 3 Must Haves for Veggie Garden Success!
1. Rain Barrel
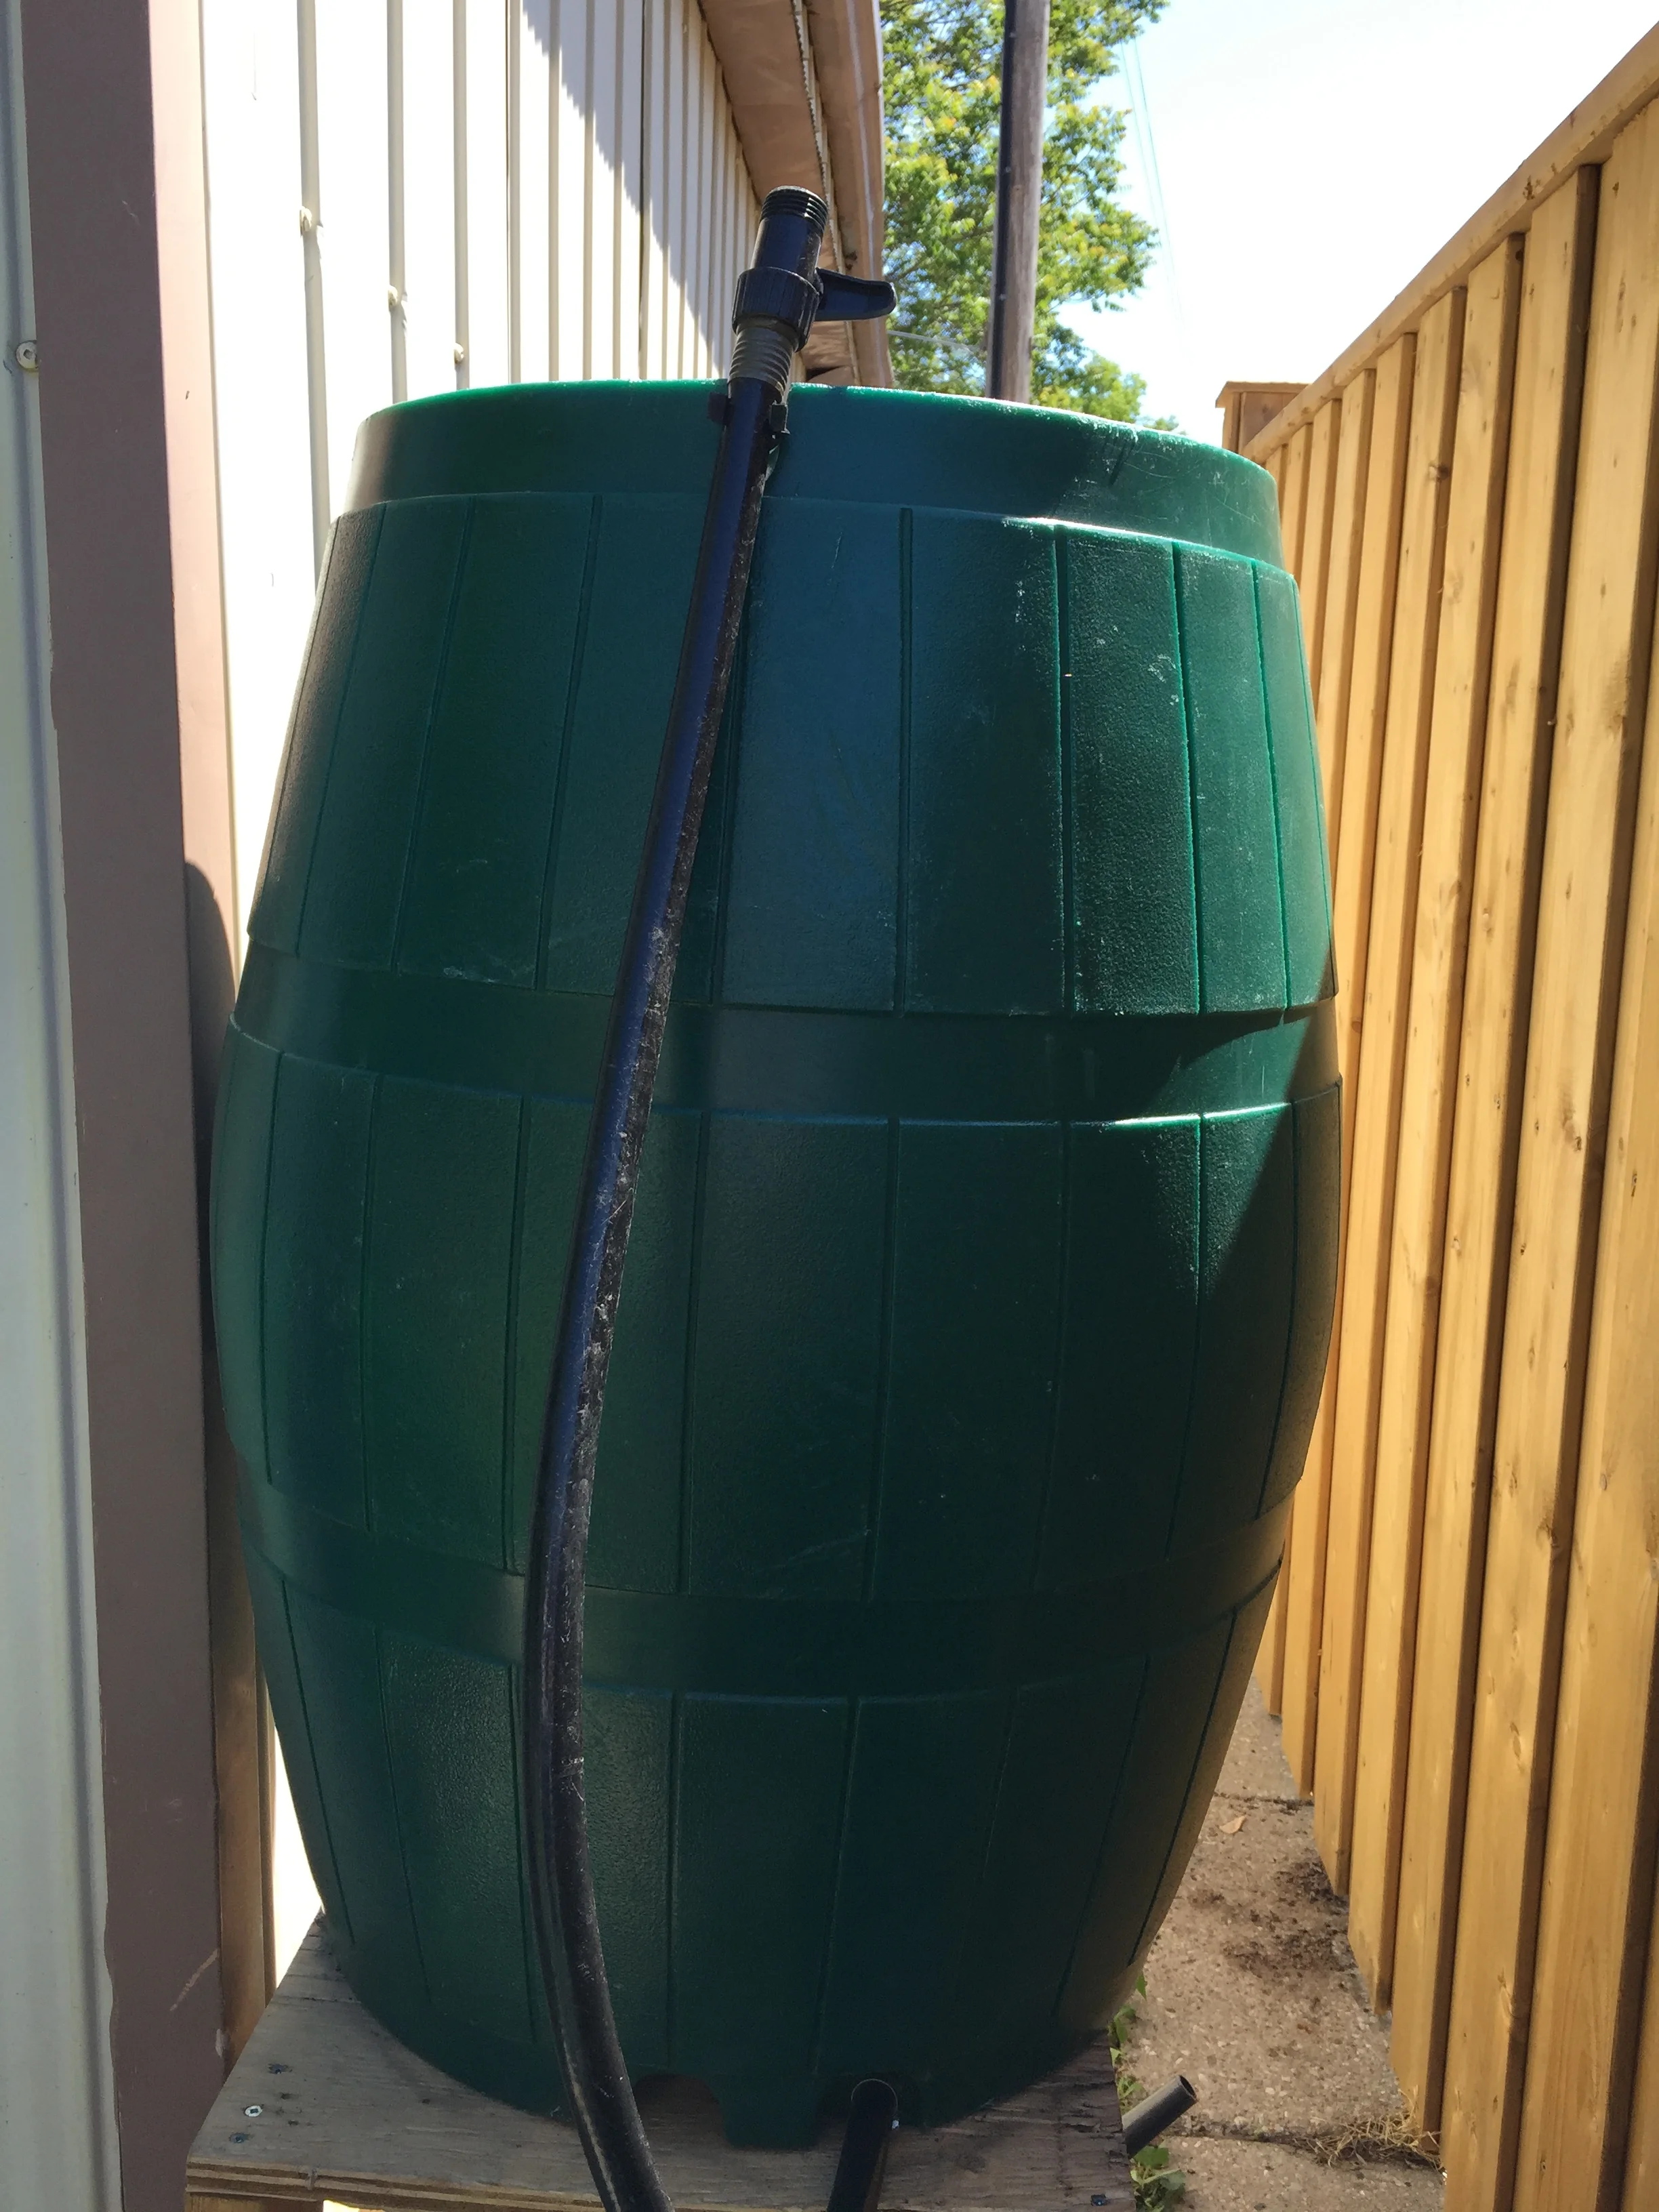
All gardens need water, so this one is a no brainer. A rain barrel is simple to set up under any eavestrough and collects rain water to use for your garden. Not only does this save money and water, but it's actually better for your plants. Rain water doesn't have the chemicals used to treat our drinking water such as chlorine and fluoride, which can impact the growth and yield of your plants.
You can get rain barrels from stores like Home Depot or Costco for $100-$350, depending on the size and material used. Craigstlist & Kijiji are also great places to check for gently used rain barrels. A word to the wise, we got ours via a community project last year for $50, so I encourage you to look online and check sales around the GTA. There are lots of special water events throughout the year, where they discount barrels to encourage people to use them. Always worth checking.
Note: If you don't have a rain barrel or space for one, consider filling a bucket or bin with hose water and allow it to sit in the sun for a few hours to help burn off the chemicals before using it to water your garden.
2. Garden Covers

There is nothing worse than going to all the work of planning and planting a beautiful garden, only to find the whole thing pillaged by pests. Garden covers allow your plants to get the sunlight, rain and fresh air they need, while preventing rodents and neighbourhood pets from using your garden as a litter box or buffet. This is especially important in the early days of planting seeds or seedlings, because these young plants are tender and sweet and animals love to snack on them. I find they're also essential in keeping plants safe from curious toddlers and clumsy preschoolers.
I love these Pop Up Plant Covers from Lee Valley that we got last year. (**Updated to note that Lee Valley is no longer selling this product. They can be found online at www.gardenguard.net) They are adjustable with zip in panels, so you can tailor the size of the cover for your specific garden, plus they fold up nice and small for winter storage. We love the way they cover our raised beds and make our garden look way more hardcore than it actually is ;) An 8 foot section costs $39.50 and additional 2.5 foot zip in sections can be purchased for $19.50.
Note: When we're out in the garden we open the ends to allow bees and other insects access to help with pollination. Especially when plants like strawberries are flowering.
3. Spiral Stakes
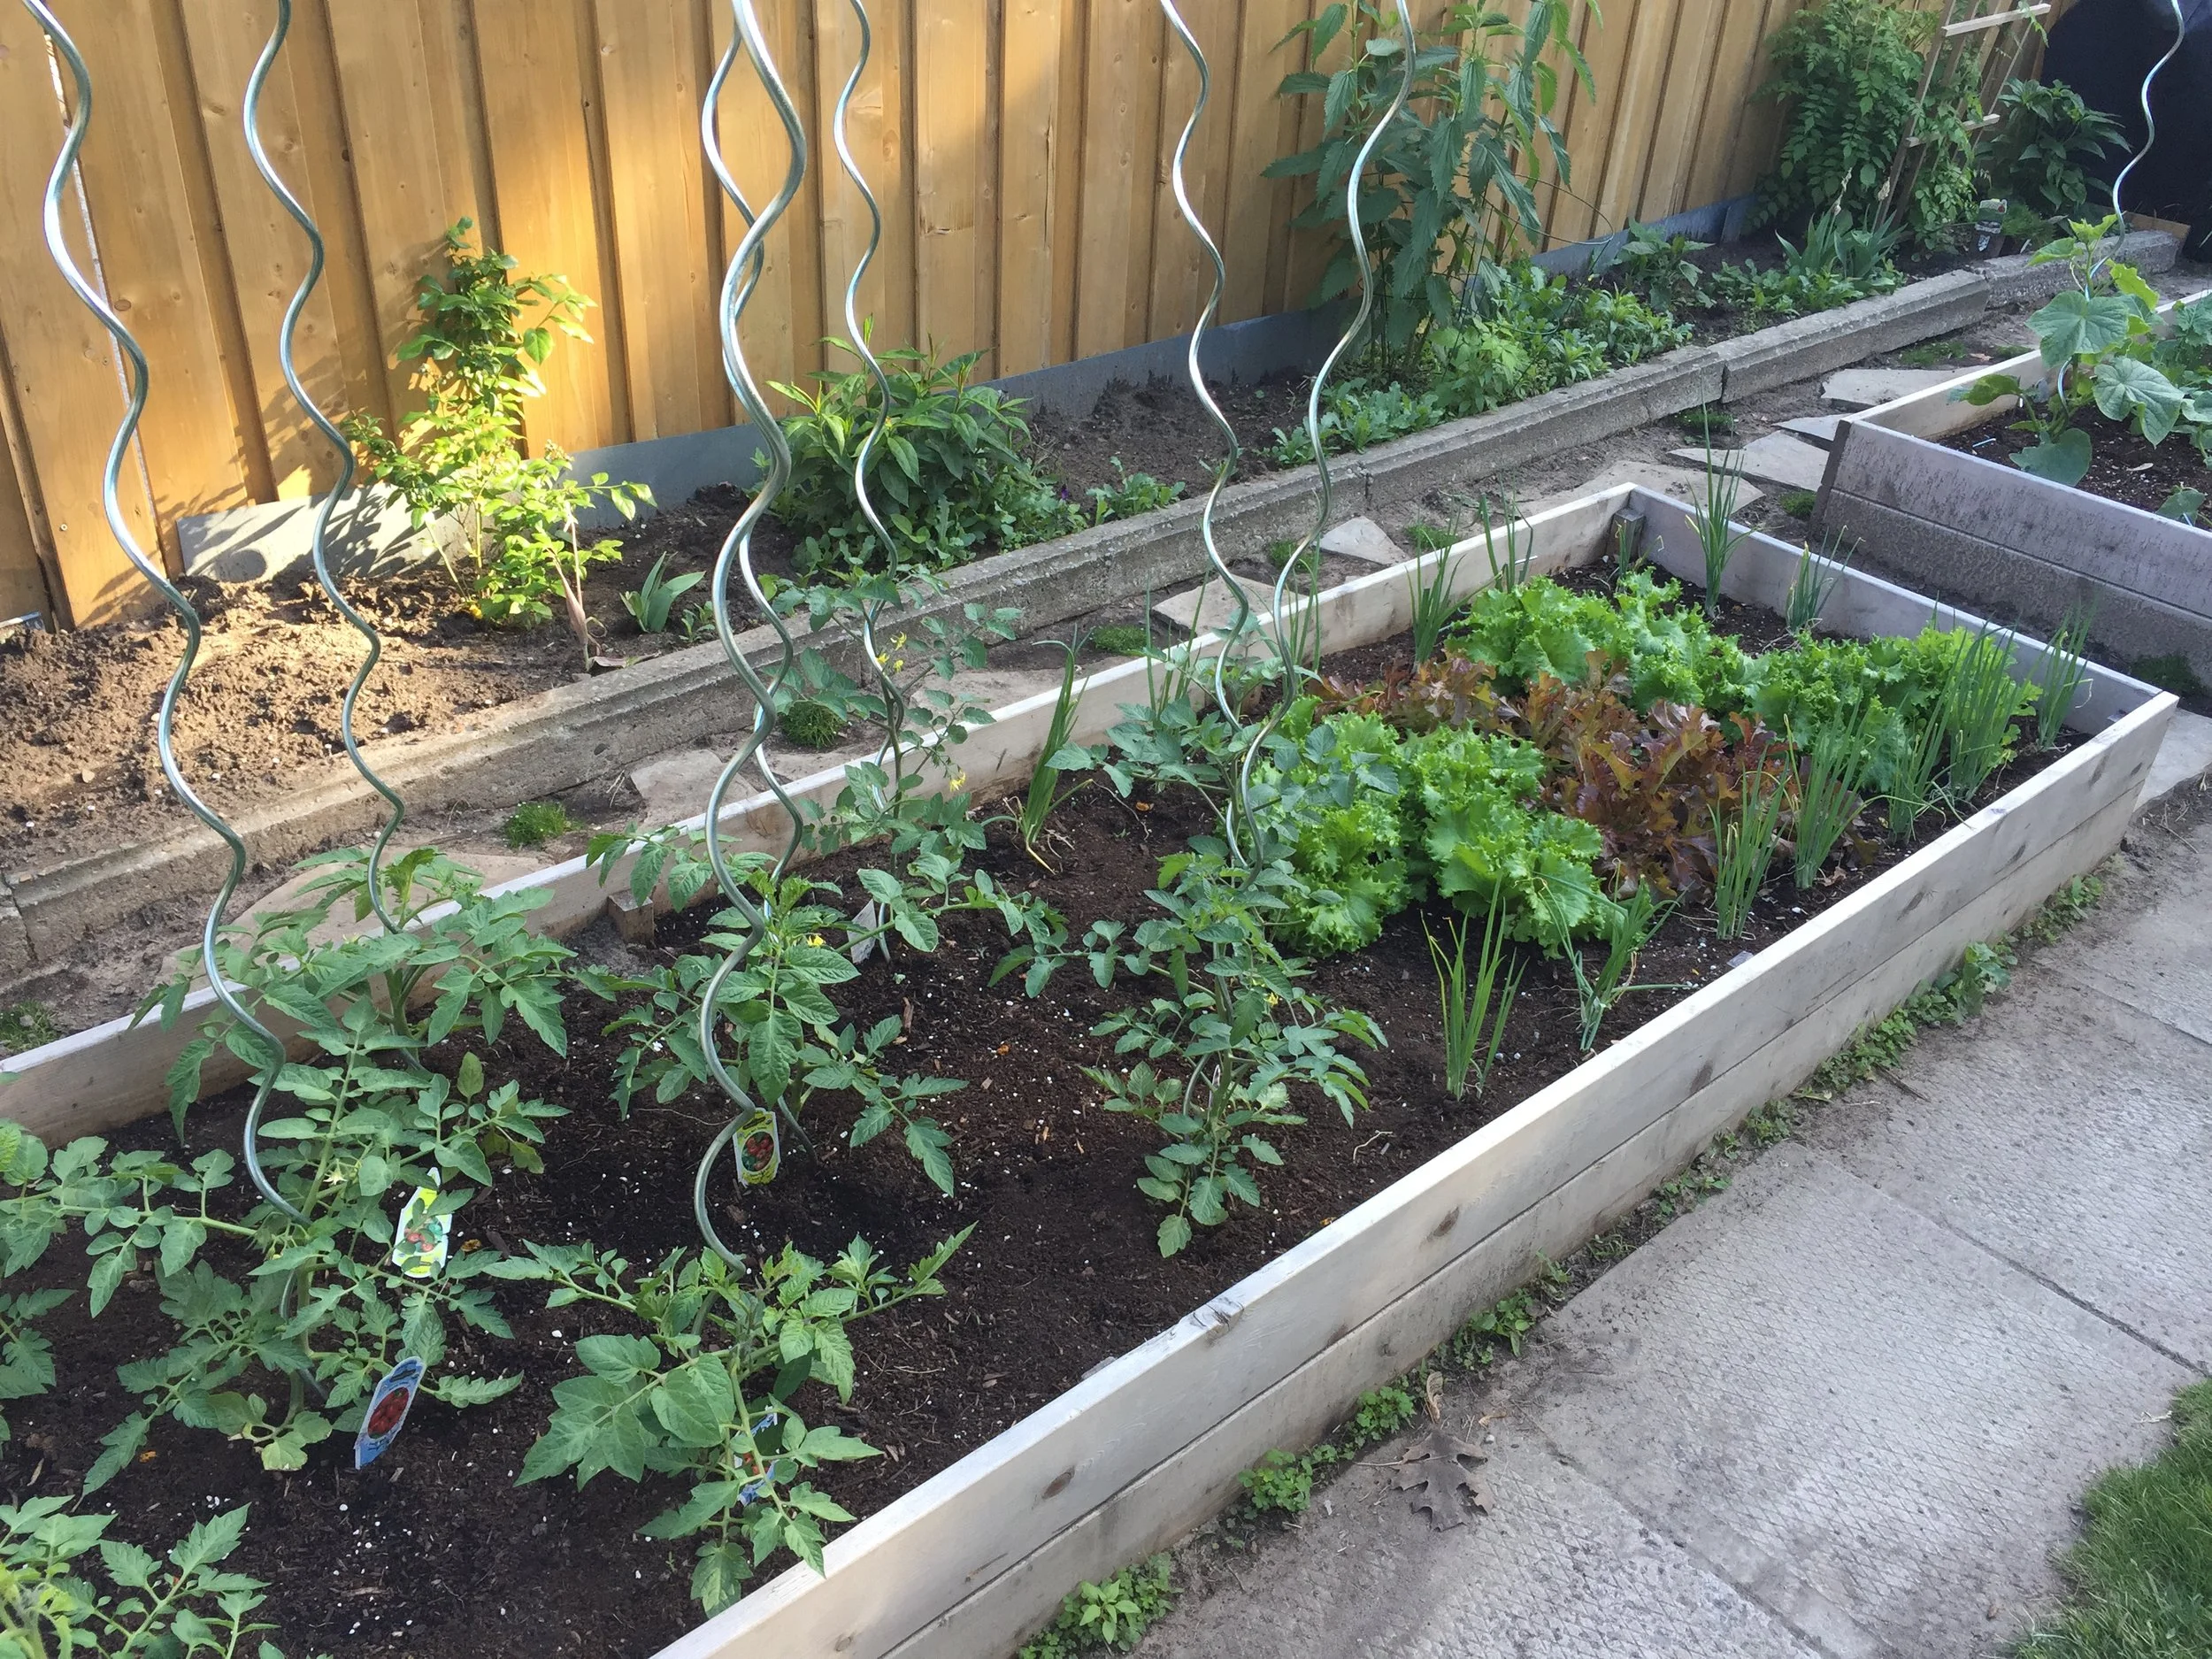
If you like to grow vine plants like Tomatoes or Cucumbers, spiral stakes are a must have. Using a stake for each plant drastically reduces the amount of space each plant takes up and allows for the fruit to hang off the vine avoiding the rot that happens when they sit along the ground.
Once again, these Tomato Spirals were a Lee Valley purchase and cost $24.50 for a set of 5 steel stakes. I have seen similar stakes for $2 at Dollaramma, but would hesitate to buy these, as you never know what type of metal was used. Since these stakes will be in your garden with rain water running over them into your soil, it's important that they don't have any harmful toxins, like lead, used in the production of them.
Note: We tried these for squash last year and found that the weight of the squash was too much and they didn't grow well. Best to allows these heavier veggies to be ground crawlers.
Hope you enjoy these must haves as much as I do. I'll be sure to share some other gardening tips and tricks over the next few weeks.
Good luck with your garden!
- Care
*This is not a sponsored post.